If you’re looking for a BBQ recipe that’s guaranteed to impress without being overly complicated, baby back ribs are hard to beat. With a mix of honey, brown sugar, butter, rub, and BBQ sauce, these ribs come out incredibly tender, packed with flavor, and exactly what people hope for when they hear the words “BBQ ribs.”
This is the kind of cook that fills the backyard with that unmistakable smoky smell and has people asking when dinner’s ready long before it actually is.
Why I Love This Recipe
Ribs are one of my favorite things to make for a crowd because they’re predictable, forgiving, and always a hit. Once you’ve cooked them a few times, you can almost set your watch by the timeline. Another thing I really like about ribs is how easy they are to customize. Simply changing the rub or BBQ sauce lets you go sweet, spicy, or somewhere in between without changing the overall process at all.
This recipe uses a classic wrap-and-glaze method that produces ribs that are truly fall-off-the-bone tender. They may not have a ton of bark, but what you get instead is incredibly juicy meat that pulls cleanly from the bone every time.
Cooking Basics
Rib Prep (The Day Before)
The first step is removing the membrane from the back of the ribs. This membrane blocks smoke and seasoning and doesn’t add anything good to the final result. Start on the narrow end of the rack with the bone side up, slide a spoon under the membrane to loosen it, then grab it with a paper towel and pull it off in one piece.
Once the membrane is removed, pat the ribs dry and check for any stray bone shards or large pieces of fat that need trimming.
Apply your binder if you’re using one (oil or mustard both work), then coat the ribs generously with your rub. Be sure to season both sides and the edges. I like to start on the bone side so the meat side is seasoned last and keeps more rub on it.
Wrap the ribs tightly in plastic wrap and place them in the fridge overnight.
Fire Up the Pit
Preheat your smoker or grill to 225°F using indirect heat. Hickory, apple, or maple all work great for ribs.
Place the ribs on the smoker meat side up and let them cook undisturbed for 2 hours.
The Wrap (Texas Crutch)
After two hours, remove the ribs and prepare a large sheet of heavy-duty aluminum foil. Lay down brown sugar, butter, and honey, then place the ribs meat side down on top of that mixture. Add more brown sugar, butter, and honey on the bone side, pour in the apple juice, and seal the foil tightly.
This step braises the ribs and is what makes them incredibly tender.
Return the wrapped ribs to the smoker meat side down and cook for another 2 hours.
Sauce & Finish
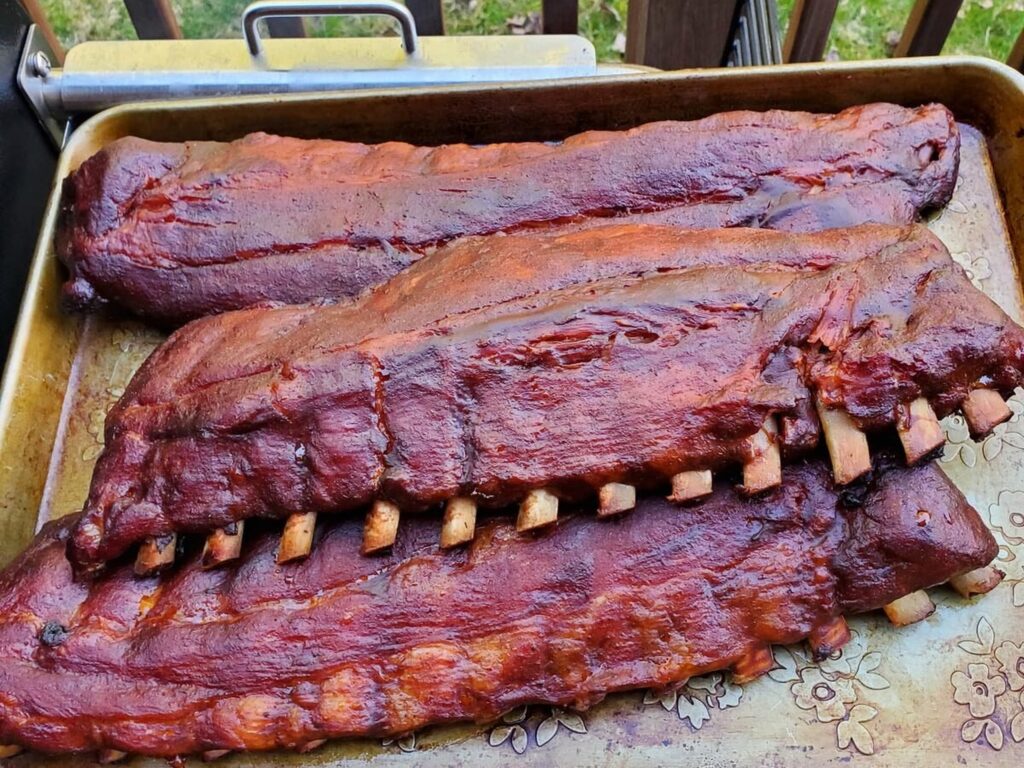
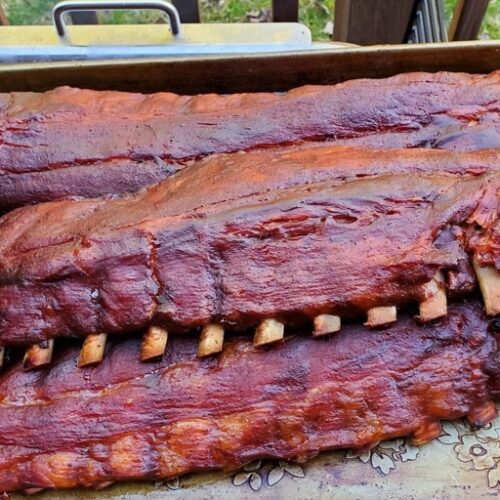
After four hours total, unwrap the ribs and place them back on the smoker meat side up. Brush generously with BBQ sauce and let them cook for 30 minutes so the sauce can caramelize.
To check doneness, look for exposed bone ends, try the bend test with tongs, or twist a rib to see if it pulls free easily.
Remove the ribs, let them rest for about 10 minutes, and get ready to eat.
Final Thoughts
Ribs are one of those BBQ staples that never get old. I love how consistent they are, how easy they are to plan around, and how fun they are to experiment with. Swapping rubs and sauces gives you endless flavor options, and even small changes like butcher paper instead of foil can dramatically change the final texture.
If you prefer more bark, try wrapping in butcher paper or skipping the wrap entirely. If you want ultra-tender ribs that pull clean from the bone, this foil-wrapped method is hard to beat.
🔥 So fire up the pit, and let’s grill and chill.
Baby Back Ribs (Sweet, Sticky, and Fall-Off-the-Bone Tender)
If you’re looking for a BBQ recipe that’s guaranteed to impress without being overly complicated, baby back ribs are hard to beat. With a mix of honey, brown sugar, butter, rub, and BBQ sauce, these ribs come out incredibly tender, packed with flavor, and exactly what people hope for when they hear the words “BBQ ribs.”This is the kind of cook that fills the backyard with that unmistakable smoky smell and has people asking when dinner’s ready long before it actually is.
1/4cuprib rubHoney Hog or Sweet Heat, or your favorite
2tbsphoney
1/2cupbutter
1/2cupbrown sugar
1cupapple juice
1/2cupBBQ sauce
Instructions
Remove membrane from ribs, pat dry, and trim excess fat.
1 rack baby back ribs
Apply binder (optional) and coat ribs generously with rub.
1/4 cup rib rub
Wrap ribs in plastic wrap and refrigerate overnight.
Preheat smoker or grill to 225°F using indirect heat.
Cook ribs meat side up for 2 hours.
Wrap ribs in foil with butter, brown sugar, honey, and apple juice.
2 tbsp honey, 1/2 cup butter, 1/2 cup brown sugar, 1 cup apple juice
Return ribs to smoker meat side down for 2 hours.
Unwrap ribs, place meat side up, and brush with BBQ sauce.
1/2 cup BBQ sauce
Cook 30 minutes until sauce caramelizes and ribs pass bend test.
Rest 10 minutes, then serve.
Keyword baby back ribs, backyard bbq ribs, bbq pork ribs, bbq ribs recipe, easy rib recipe, fall off the bone ribs, pork ribs, rib recipe for beginners, ribs on smoker, smoked baby back ribs, smoked ribs, sweet ribs


")
")
")
")
")
")