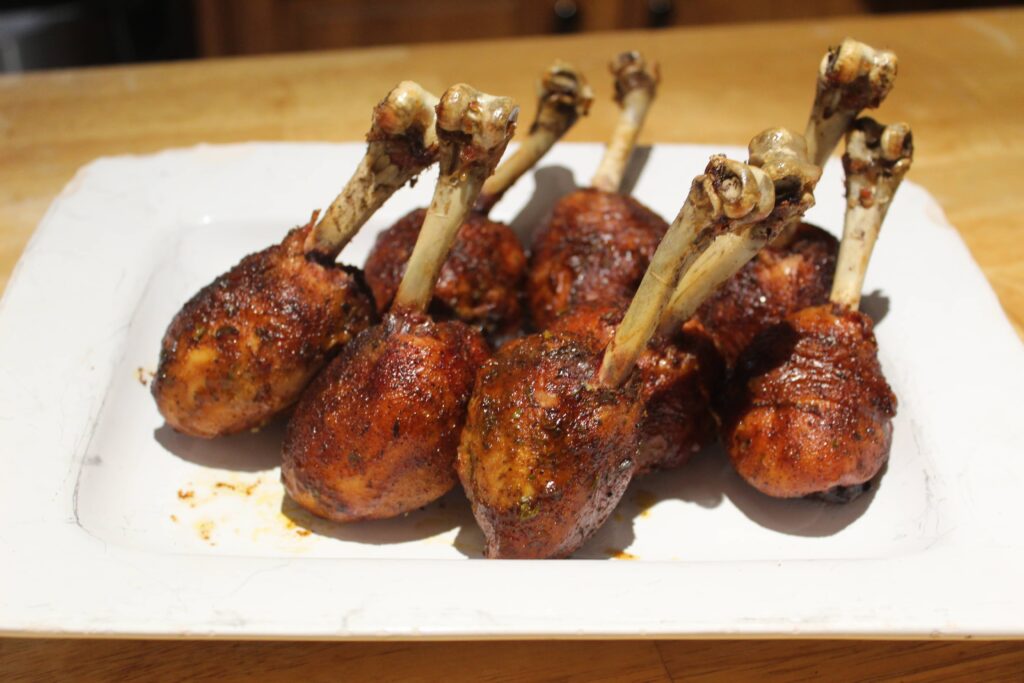
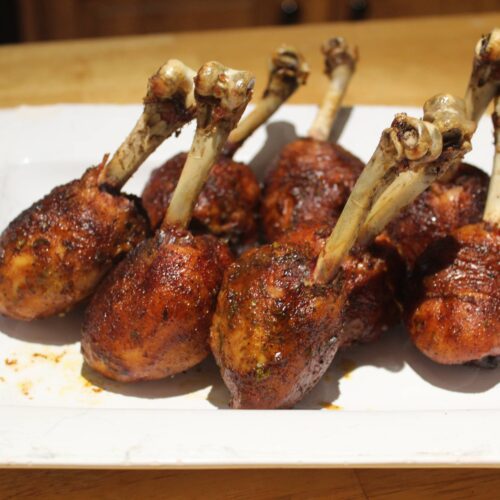
Chicken Lollipops


Looking to try something a little different with chicken drumsticks. Not only do they look amazing, but the bone gives a nice clean handle to hold onto your food with. Seasoned with a sweet chicken rub and bathed in bbq sauce, these drumsticks are sure to be a hit at your next get together.

Chicken lollipops seem to be gaining in popularity because I have seen quite a few articles and recipes for them recently. They look amazing so I decided I had to try them out for myself. They are called lollipops because you cut around the bone and push all the meat down to form a lollipop shape at the bottom. Then you clean the remaining skin and cartilage from the top which makes it look like a lollipop stick. I will give you the warning ahead of time that the prep for these takes a little bit, but I think it is totally worth it.

I do like to experiment with different ways of cooking things, so I tried these a couple ways when I cooked them up. I took the skin off most of them while prepping but left the skin on a couple drumsticks to be able to compare. I have read that if you are preparing these for competition you need the skin on because you are judged on it but if its for backyard bbq you can remove it and not hurt the finished product. A couple of the things I was focusing on comparing was if having the skin on would protect the meat more from drying out more and if it affected how well the sauce stuck to the lollipops.

Cooking Basics

I have tried to include a few different pictures to show the process of prepping the chicken legs because this took me a little bit to get down. First time making them I made up 8 and it took me somewhere between 30 to 45 minutes to get them ready to go on the smoker. I will say it sped up towards the end as I got more comfortable with the process. Before starting the prep work you will want to find a sharp knife and some meat shears to help you with the process. The first step is to take the knife and cut all the way around the end of the leg disconnecting the skin and tendons as shown below.

Cut around Bone

The next step is to grab the skin and cartilage at the end and pull it off the bone, so you have a clean handle. I found it easier to use a paper towel when tryign to get a grip. This can take a little effort to accomplish.

Clean End of Bone

Now that you have the end completed the next step is to clean out the end that will form the lollipop. To do this you will need to feel around the bone to find a tiny bone that is alongside it. You will need to break this bone and remove it. Then you will need to use the meat shears to cut all the tendons that are remaining on the drumstick.

Prepared Shrimp

Now that the drumstick is cleaned up you will want to wrap your hand around the top of the meat and push down until it forms a round shape at the bottom of the bone.

Prepared Shrimp

At this point you need to decide if you want to remove the skin or not. I removed it on most of the drumsticks and left it on a couple just to compare. My results were that it didnt end up making any difference in the final product that I noticed so choose which way you prefer to have them. Repeat the above steps for all the drumsticks and then you are ready to add the rub.

Prepared Shrimp

For the rub I used Chick Magnet which is one of my favorite chicken rubs. Feel free to substitute your own favorite to use.

Prepared Shrimp

Preheat your smoker or grill to 300 degrees. You will want to use indirect heat to cook if using a grill. If using a smoker, I suggest using some type of fruit wood or hickory. If you only have a grill but would still like to smoke the chicken, you can buy yourself a smoke tube which can sit on your grill and produce the same effect as a smoker. This could be used with most of the recipes on my blog. I have included a link below if you are interested. While the smoker / grill is coming up to temp there are a couple last minute things to do to prep the chicken. I got these suggestions from an article by Malcolm Reed. He suggested wrapping the ends of the bone in tin foil before cooking them. If you do not do this the ends will end up blackening durring the cook. It really won’t affect the flavor of the meal, but I think it looks a lot nicer if they are not. The other suggestion he had that I used was to put a stick of butter in the bottom of the pan with the chicken in it. He mentioned this helping with moisture durring the cook. Once the smoker / grill is up to temperature, throw the drumsticks on and let them cook until the internal temperature reaches 165 to 170 degrees.

Shrimp on Smoker

Once the drumsticks have reached this internal temperature, they are ready to have the sauce put on them. In most recipes you use a brush but, in the recipes,, I see for this they are always dunked, I think this is to give them a thicker coat or bbq sauce which makes them end up with a shiny finish. Dunk all your drumsticks and place them on a wire rack if you have one. This makes it easier to transfer. At this point you can also remove the tinfoil from the end of the drumsticks.

Prepared Shrimp

Once this step is done you will throw the chicken back on the smoker for another half hour or so to allow the sauce to set and the chicken to come up to the final internal temperature we are looking for which is 175 degrees.

Once the time is up, you can remove these and then you’re ready to eat.

Final Thoughts

Skin On / Off Experiment - For this experiment the only difference in how I prepared the drumsticks, other than actually removing the skin or not, was that I put a little baking powder on the ones with skin as I have had good results with this helping the skin not be rubbery. With the finished product there were a few things I was focusing on when trying them. Dryness of the meat was one of the main comparison points. I did not really notice any difference in dryness between the ones with and without skin. I do wonder if the butter bath I cooked them in had something to do with this though and if I had not done that would I have gotten the same results. I guess thats an experiment for another day. The other thing I was looking for was how well the rub and sauce stuck to the chicken. I did not notice any real difference with this either with the finished product. They looked about the same and I could taste the sauce on both variations. The result of this for me is to just go with what you like. Some people like the skin. I like trying to make meals healthier if it does not affect the flavor and skin is the worst part, healthwise, when having chicken so I will probably continue to remove the skin when cooking these in the future.

Alternatives - There are a few variations of this recipe I would like to try and compare.

  • Sauce - I would like to try dunking the chicken in the bbq sauce multiple times to try to get a little thicker layer on. Maybe give it a layer and then put it on the smoker for 15 minutes then give it one more layer and cook for the final 15 minutes. Although the final product tasted amazing, I would like to try to get a shinier look to it than I did. I just used a store bought bbq sauce that was brown. I would like to try one out with a brighter color just to see how they would look.
  • Wrap - I saw some variations that wrapped the lollipop in bacon. I would like to see how that flavor combination turns out as well

Recipe


Chicken Lollipops Recipe

Looking to try something a little different with chicken drumsticks. Not only do they look amazing but the bone gives a nice clean handle to hold onto your food with. Seasoned with a sweet chicken rub and bathed in bbq sauce, these drumsticks are sure to be a hit at your next get together.

Recipe Information

  • Prep Time: 45 Minutes
  • Cook Time: 2 Hours 30 Minutes
  • Rest Time:
  • Total Time: 3 Hours 15 Minutes
  • Servings: 4 (2 drumsticks per person)
  • Category: Main Course

Ingredients

  • 8 Chicken Drumsticks
  • 2 Tbsp Chicken Rub ( I prefer Chick Magnet but feel free to substitute with your own favorite rub)
  • 1/2 Cup Butter
  • 1 Bottle BBQ Sauce

Instructions

  1. Cut around bone at end of drumsticks
  2. Remove skin and cartilagde from end of drumstick
  3. Remove small bone that runs along the drumstick bone and trim all the tendons that are exposed
  4. Push meat down to bottom of bone until it forms a round shape
  5. Remove skin (Optional Step)
  6. Add rub to all of yrou drumsticks on all sides
  7. Wrap end of each drumstick in tinfoil so the bones don’t look blackened when finished
  8. Place drumsticks into an aluminum pan with melted butter in bottom of pan
  9. Preheat smoker / grill to 300 degrees (If smoking try to use fruit wood / hickory)
  10. Place on smoker / grill over indirect hear to cook
  11. Cook until internal temperature of chicken reached 165 to 170 degrees (1 1/2 to 2 hours)
  12. Remove chicken and dunk each drumstick in bbq sauce then place on a wire rack
  13. Remove tin foil from end of drunsticks
  14. Put drumsticks back on smoker / grill for 1/2 hour to allow bbq sauce to set and chicken to come up to 175 degrees internal temperature then remove from heat
  15. Serve and enjoy!

Helpful Items


comments powered by Disqus